

Tattoo Artist

Before and After Post Ideas for Tattoo Artists

Stop overthinking your Instagram. Use these specific before after post ideas for tattoo artists to showcase cover-ups, healed work, and stencils.

3 min read Updated Jun 26, 2026 Used by 1,000+ businesses
Before and After Post Ideas for Tattoo Artists
BrandZillaBrandZilla EditorialReviewed by marketing operators

Most tattoo artists make the mistake of thinking a 'before and after' is only for cover-ups. In reality, these posts are your most powerful tool for showing how you handle skin texture, how you plan a layout, and how your work ages over time. When a client scrolls your Instagram, they aren't just looking for pretty art; they are looking for proof that you can handle their specific arm, leg, or back.

The goal of a transformation post isn't just to show off your machine work. It’s to lower the 'barrier of fear' for a new client. Whether you are covering up a 20-year-old regret or simply showing a stencil-to-ink evolution, these posts demonstrate professional authority.

Reality check: Most clients can't visualize how a flat drawing becomes a 3D piece of body art. Your 'before' photos provide the context they need to trust your process.

Quick tips

1

Maintain Consistent Lighting

Use a ring light or softbox to ensure the 'before' and 'after' have the same color temperature.

2

Lead with the Result

The 'After' shot should always be the hook. Nobody follows a tattoo artist to see old, bad tattoos first.

3

Caption the Strategy

Explain your thought process—why you chose certain colors or shapes to hide the old ink.

4

Use Video Transitions

A 5-second video 'reveal' often performs better than a static image carousel.

Stay consistent without hiring a social media manager

A simple weekly content system that keeps your business visible and trusted online — no daily improvisation.

No spam. Unsubscribe anytime.

The Art of the Cover-Up Reveal

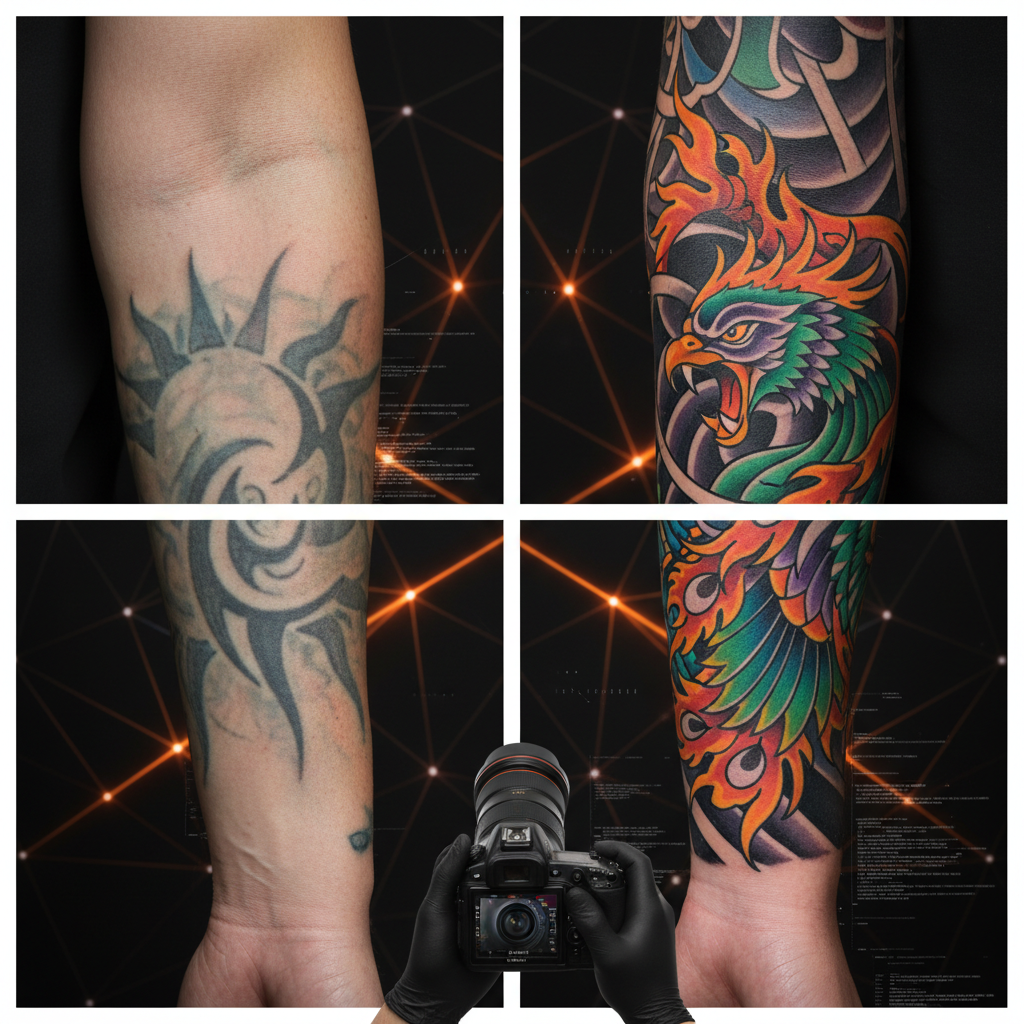
Cover-ups are the bread and butter of 'before and after' content. They provide high emotional stakes and immediate visual impact.

What actually works: Instead of just showing the two photos side-by-side, use a Reel with a 'wipe' transition. It feels more tactile and shows exactly how the new ink masks the old lines.

Focus on the problem you solved. Was the old tattoo too dark? Was it scarred? Show the 'after' and explain in the caption how you used color theory or heavy blackwork to hide the previous mistake.

Example 1

The 'Ex-Name' Delete: Show the old script versus the new floral or geometric piece.

Example 2

The Layout Fix: An old, poorly centered tattoo replaced by a larger piece that fits the anatomy correctly.

Example 3

Blast-Over Style: Showing the old tattoo still faintly visible under a bold new traditional piece.

Example 4

Saturation Boost: Taking a faded, 15-year-old grey wash and hitting it with bold American Traditional colors.

Example 5

Scar Camouflage: (With client permission) showing the 'before' skin and the final artwork that boosts their confidence.

Proving Longevity with Healed Results

The biggest fear a new tattoo client has is: 'Will this look good in a year?' You can solve this by posting healed photos.

Local business example: A shop in Austin doubled their bookings for fine-line work simply by showing 1-year healed shots next to the day-of-session photos. It proves their lines don't 'blow out.'

When a client comes back for a touch-up or a new piece, grab them for 2 minutes to take a 'healed' photo. This is the most valuable marketing asset you own.

Example 1

Fine Line Longevity: A 6-month-old script next to the fresh photo to show zero blurring.

Example 2

Color Retention: A vibrant neo-traditional piece after 2 summers of sun (and sunscreen!) compared to Day 1.

Example 3

The Soften: Showing how grey-wash shading lightens and settles into the skin once healed.

Example 4

White Ink Check-In: Showing how white highlights look after the redness has completely subsided.

Example 5

The 'Living' Tattoo: A side-by-side of a hand or finger tattoo—fresh vs. 3 months—to show realistic wear.

From Stencil to Skin: The Process Reveal

Notทุก project is a cover-up. Sometimes the 'transformation' is the process of turning a blank limb into a masterpiece.

Quick win: Take a photo of your hand-drawn sharpie 'map' on the skin before you start. It shows you aren't just a tracer—you're an artist who understands body flow.

This type of content appeals to the 'Collector' client—the person who wants a high-end, custom experience and cares about the technical journey.

Example 1

Stencil vs. Final: The purple stencil lines next to the finished, wiped-down tattoo.

Example 2

Sharpie Draft vs. Ink: Freehand muscle mapping compared to the final rendered piece.

Example 3

Session 1 vs. Session Finished: For large scale work (sleeves/back pieces), show the linework vs. the completed shading.

Example 4

The 'Anatomy' Shot: A photo of the bare limb followed by a video of the client moving that limb to show how the design flows.

Example 5

The Setup: Your clean, wrapped station next to the finished tattoo to highlight your hygiene standards.

Copy-paste AI prompt pack

Drop these straight into your post — or generate fresh ones with BrandZilla.

Captions

  • The glow-up is real. Swipe to see how we turned [Old Element] into a custom [New Style] piece. Done in [X] sessions. #TattooCoverup
  • Fresh vs. 6 Months Healed. No filters, no tricks—just solid saturation and proper aftercare. This is why we focus on depth. #HealedTattoo
  • From the first stencil layout to the final wipe. Watch the flow of this [Body Part] piece. Context is everything. #TattooProcess

Hooks

  • They told her this couldn't be covered...
  • Watch this 10-year-old regret disappear.
  • Fresh ink vs. Real life (6 months later).
  • The secret to a perfect stencil fit.

Hashtags

#tattootransformation#coveruptattoo#healedvsfresh#tattooprofessional#inkedlife#tattoostudio#beforeandaftertattoo#tattooprogression#customtattooing#blackandgreytattoo

Questions business owners actually ask

Real objections from real operators — answered straight.

BrandZillaBrandZilla EditorialReviewed by marketing operators

Free tools to keep you consistent

Quick utilities for the moments between full posts.

Most businesses stop posting after 2 weeks

BrandZilla gives small businesses a simple weekly content system — so you stay visible, build trust, and get more enquiries without hiring a social media manager.

More for Tattoo Artist

Same topic, other industries

From the blog